Mom's Homemade Chicken Fingers
Ahhh chicken fingers (aka long chicken nuggets). I have to tell you, when I was growing up I never ate chicken nuggets. Liiiiike the frozen ones…the ones that I actually make for my child but justify that it’s ok because they are organic. That’s right, my mom never bought anything like that. She made everything from scratch…everything! I think the only things she didn’t make were things like pop tarts, cereal, etc.
We never called these “chicken fingers” or “chicken nuggets” when I was growing up. We called chicken that was breaded, pan-fried, and baked, “breaded chicken.” My mom would usually make them using large chicken breasts but would sometimes cut them into strips and do the same process. My Grandpa Provenzano would do this same process with chicken (similar to a chicken Parmesan) and steak. I think it’s called “chicken fried steak” in the South. ALL cultures have their own form of breaded and fried meat I think!! The version that we made in our house was an Italian-style, but instead of covering them with marinara sauce or dipping them in ketchup, we would dip them in jelly! Don’t ask why…it just tastes good!! There is something spectacular about the sweet and savory combination, but if that weirds you out, then try some honey!
Sooooo my mom taught me how to make her recipe and here it is!

Tips for Homemade Chicken Fingers
*The chicken will be extra crispy if you let the chicken to sit in the fridge after being coated for a couple hours before frying up in the pan, but this is definitely optional.
*Use shallow dishes for dipping. This makes the process easier and helps to coat the chicken better.
*DON’T skip the step of baking in the oven. This makes the chicken juicy and crunchy.
*Season the chicken before dipping! This allows the flavor to really get into the chicken.
Homemade Chicken Fingers
4 chicken breasts cut into long strips (this recipe can also be done with whole chicken breasts, but be sure to pound them so that is the entire piece is the same thickness)
1 cup unbleached all-purpose flour
2 eggs + a splash of milk; whisked together
1 cup breadcrumbs
2 tablespoons fresh parsley, finely chopped
1/2 cup freshly grated parmesan cheese
1 tablespoon sesame seeds; optional
salt and pepper
Directions:
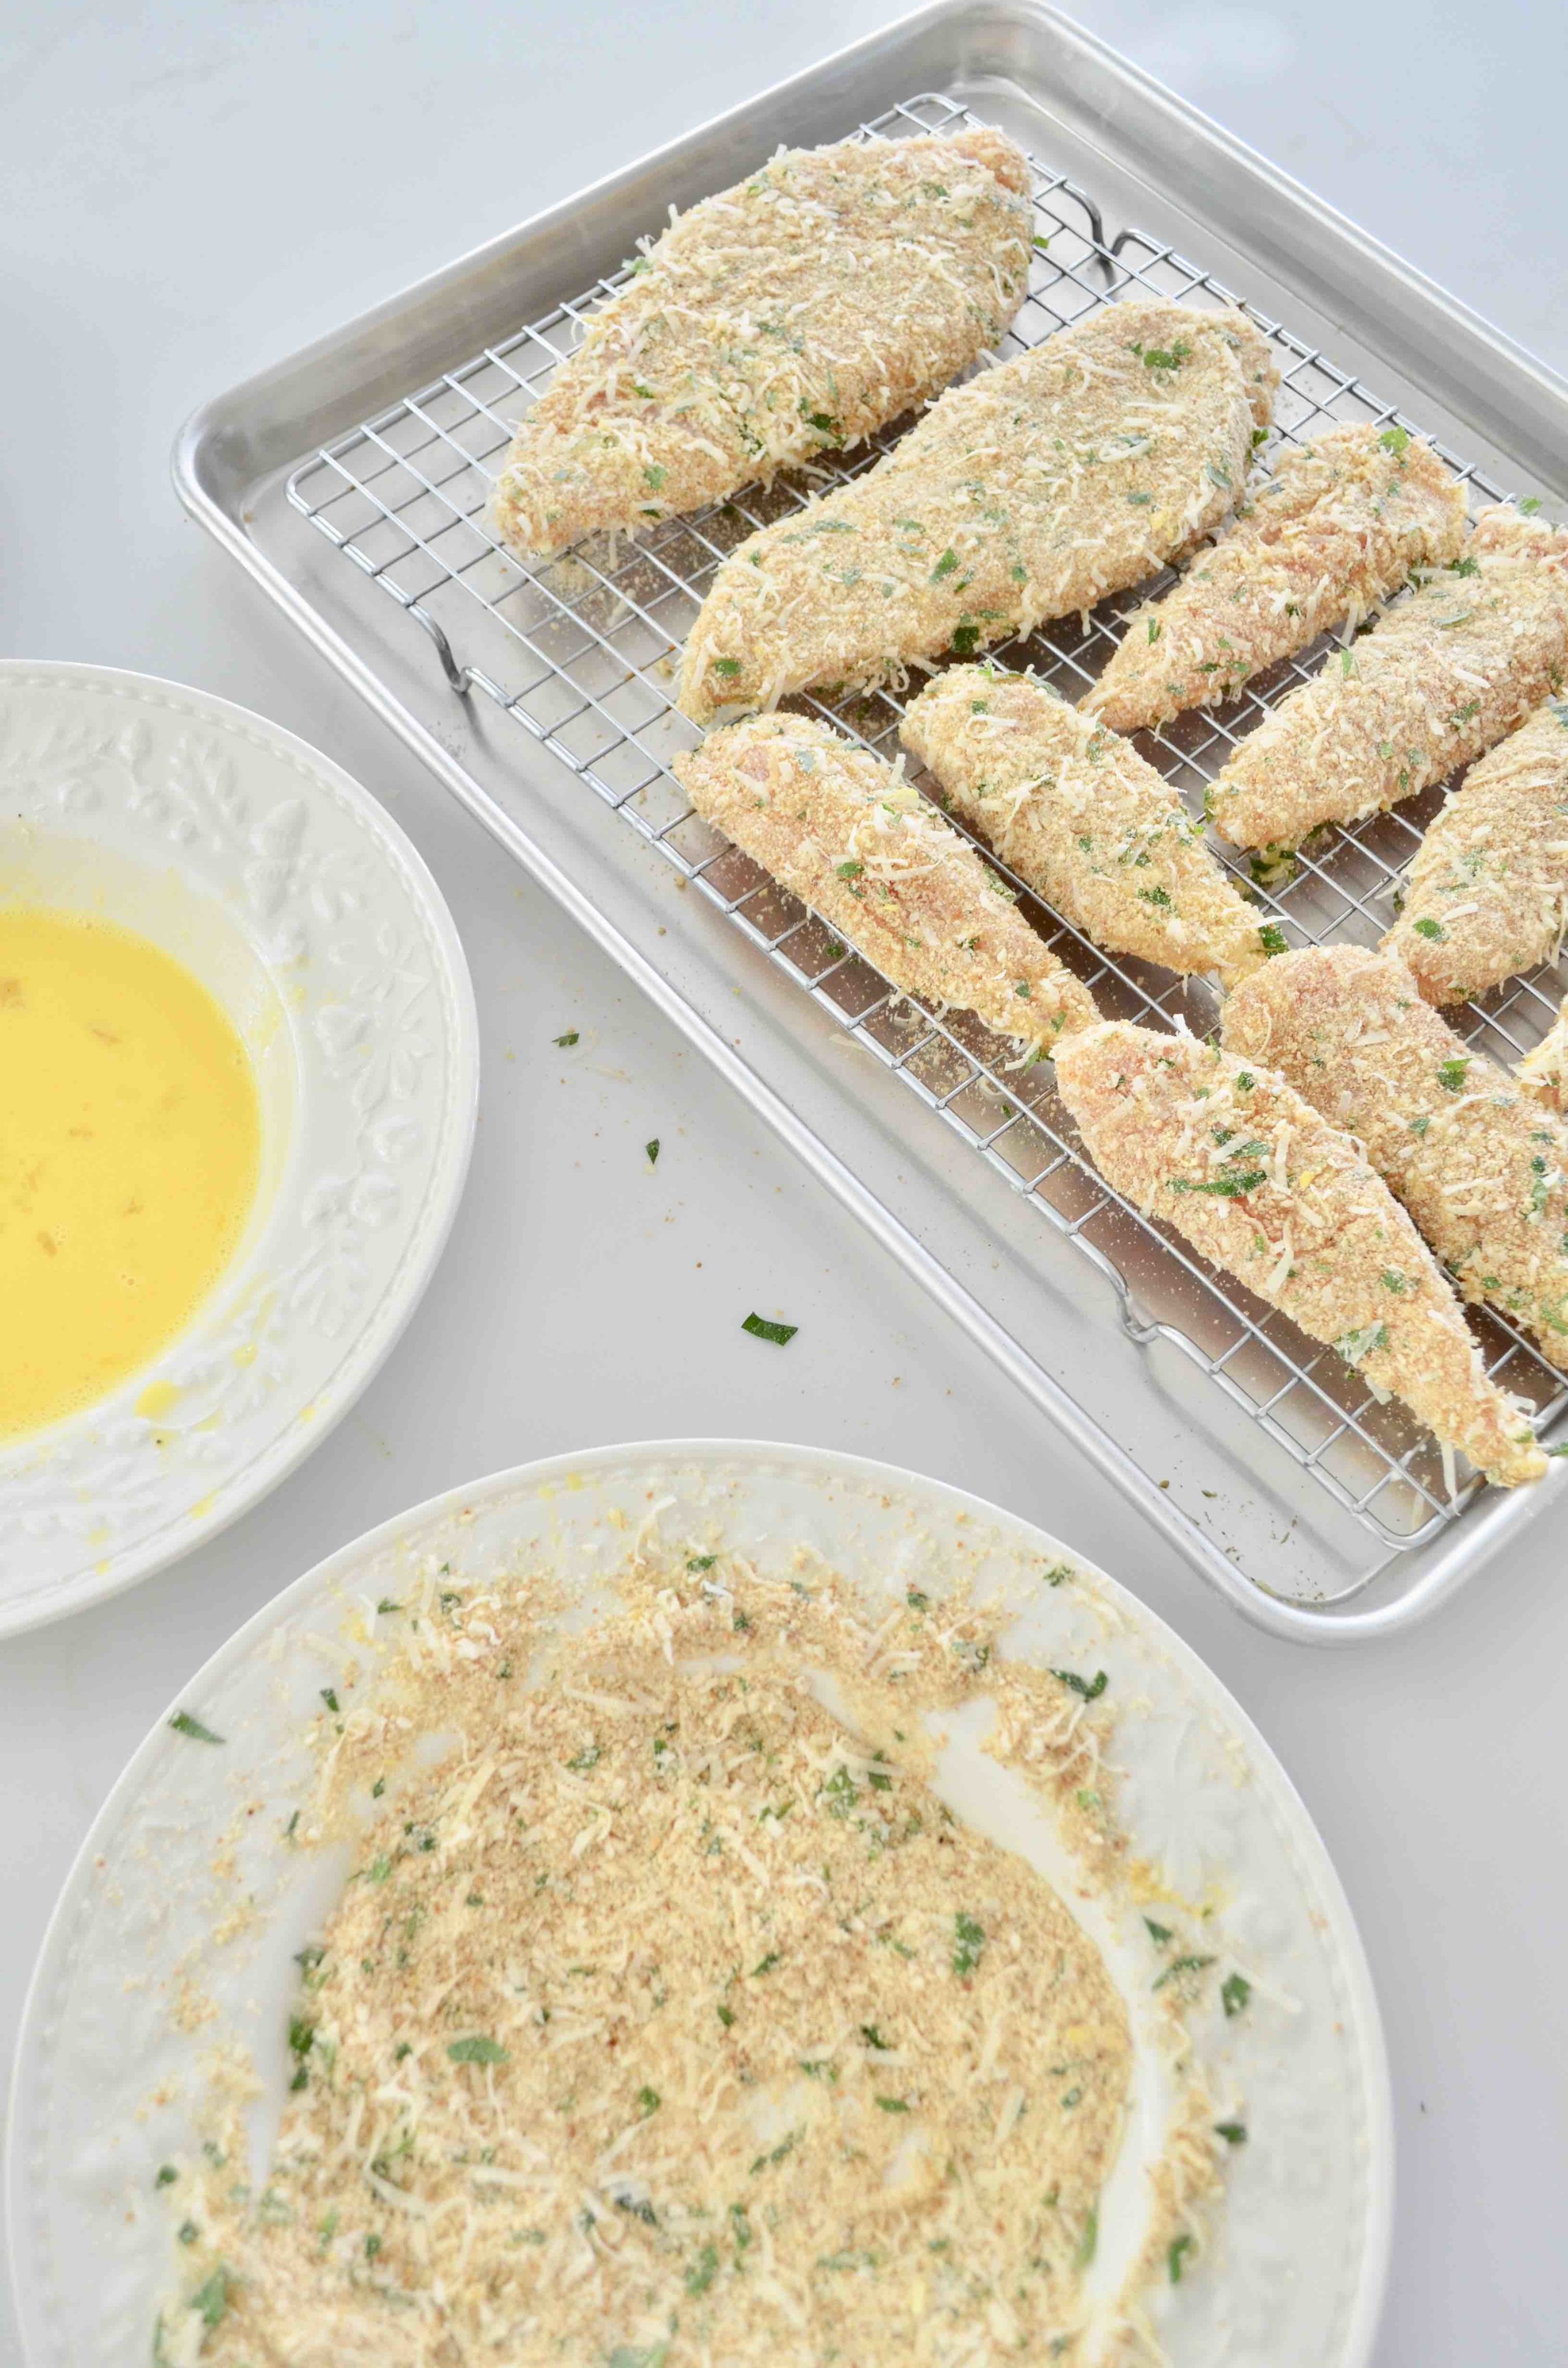
Place the flour into a shallow bowl
Place the eggs into a shallow bowl and whisk in a small splash of milk until well combined
Place the bread crumbs, cheese, parsley, and sesame seeds into a shallow bowl
Sprinkle the chicken with salt and pepper
Use a paper towel to dry off the chicken, this will help the flour stick better and create a crunchier final product
Dip one of the pieces of chicken into the flour and move it around until it is evenly and lightly coated; tap off excess flour with your hands
Dip the piece of chicken into the egg mixture until it is evenly coated
Then, dip the piece of chicken into the breadcrumb mixture and coat completely, tap off excess breadcrumbs if needed
Place the breaded chicken onto a cooling rack; doing this helps to prevent the bottom from getting soggy as you prepare the rest of the chicken
*optional to put the breaded chicken in the fridge (leaving it on a cooling rack) for a few hours…this can help the chicken become extra crispy*
Preheat oven to 350 degrees
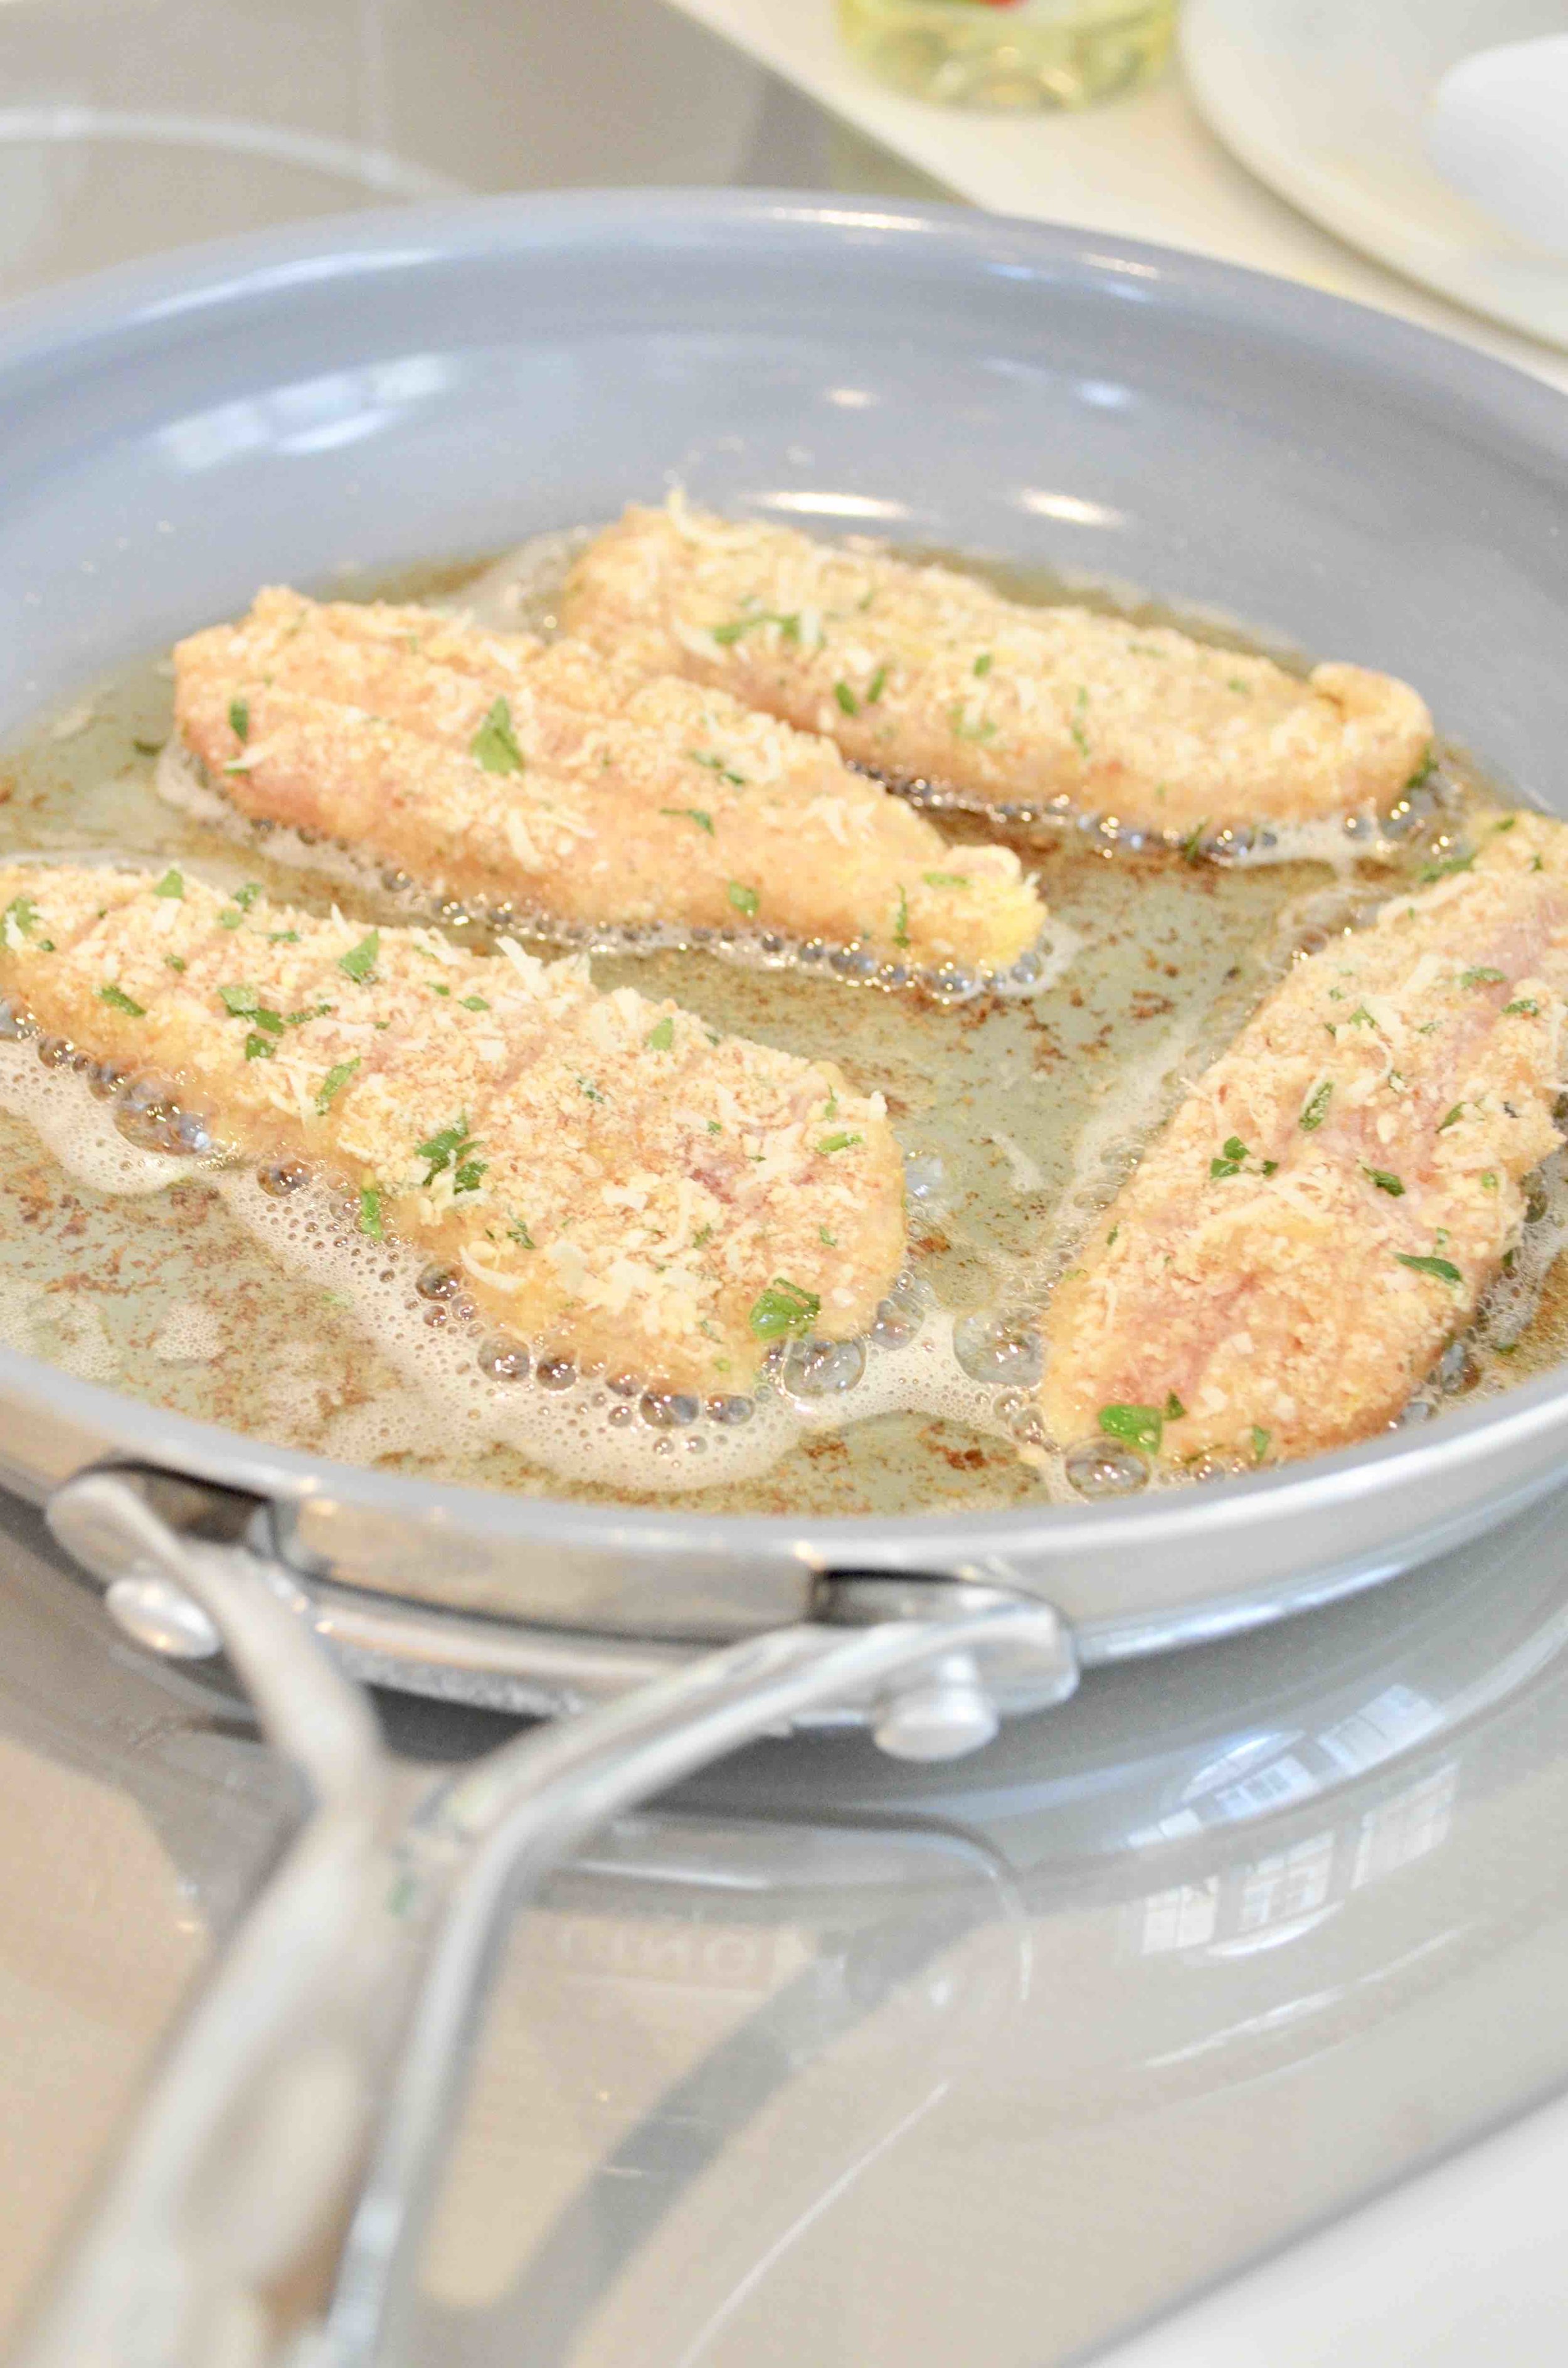
Once the rest of the chicken pieces are dipped, heat a heavy drizzle of oil into a pan; use an oil with a high smoking point like coconut oil or sunflower oil (my mom swears by olive oil)
Make sure the oil is hot enough by dropping in a few breadcrumbs and if they immediately sizzle then the oil is ready
Place a few pieces of the breaded chicken pieces into the oil, making sure not to crowd the pieces
Cook for a few minutes, until golden brown, then flip over and cook the other side
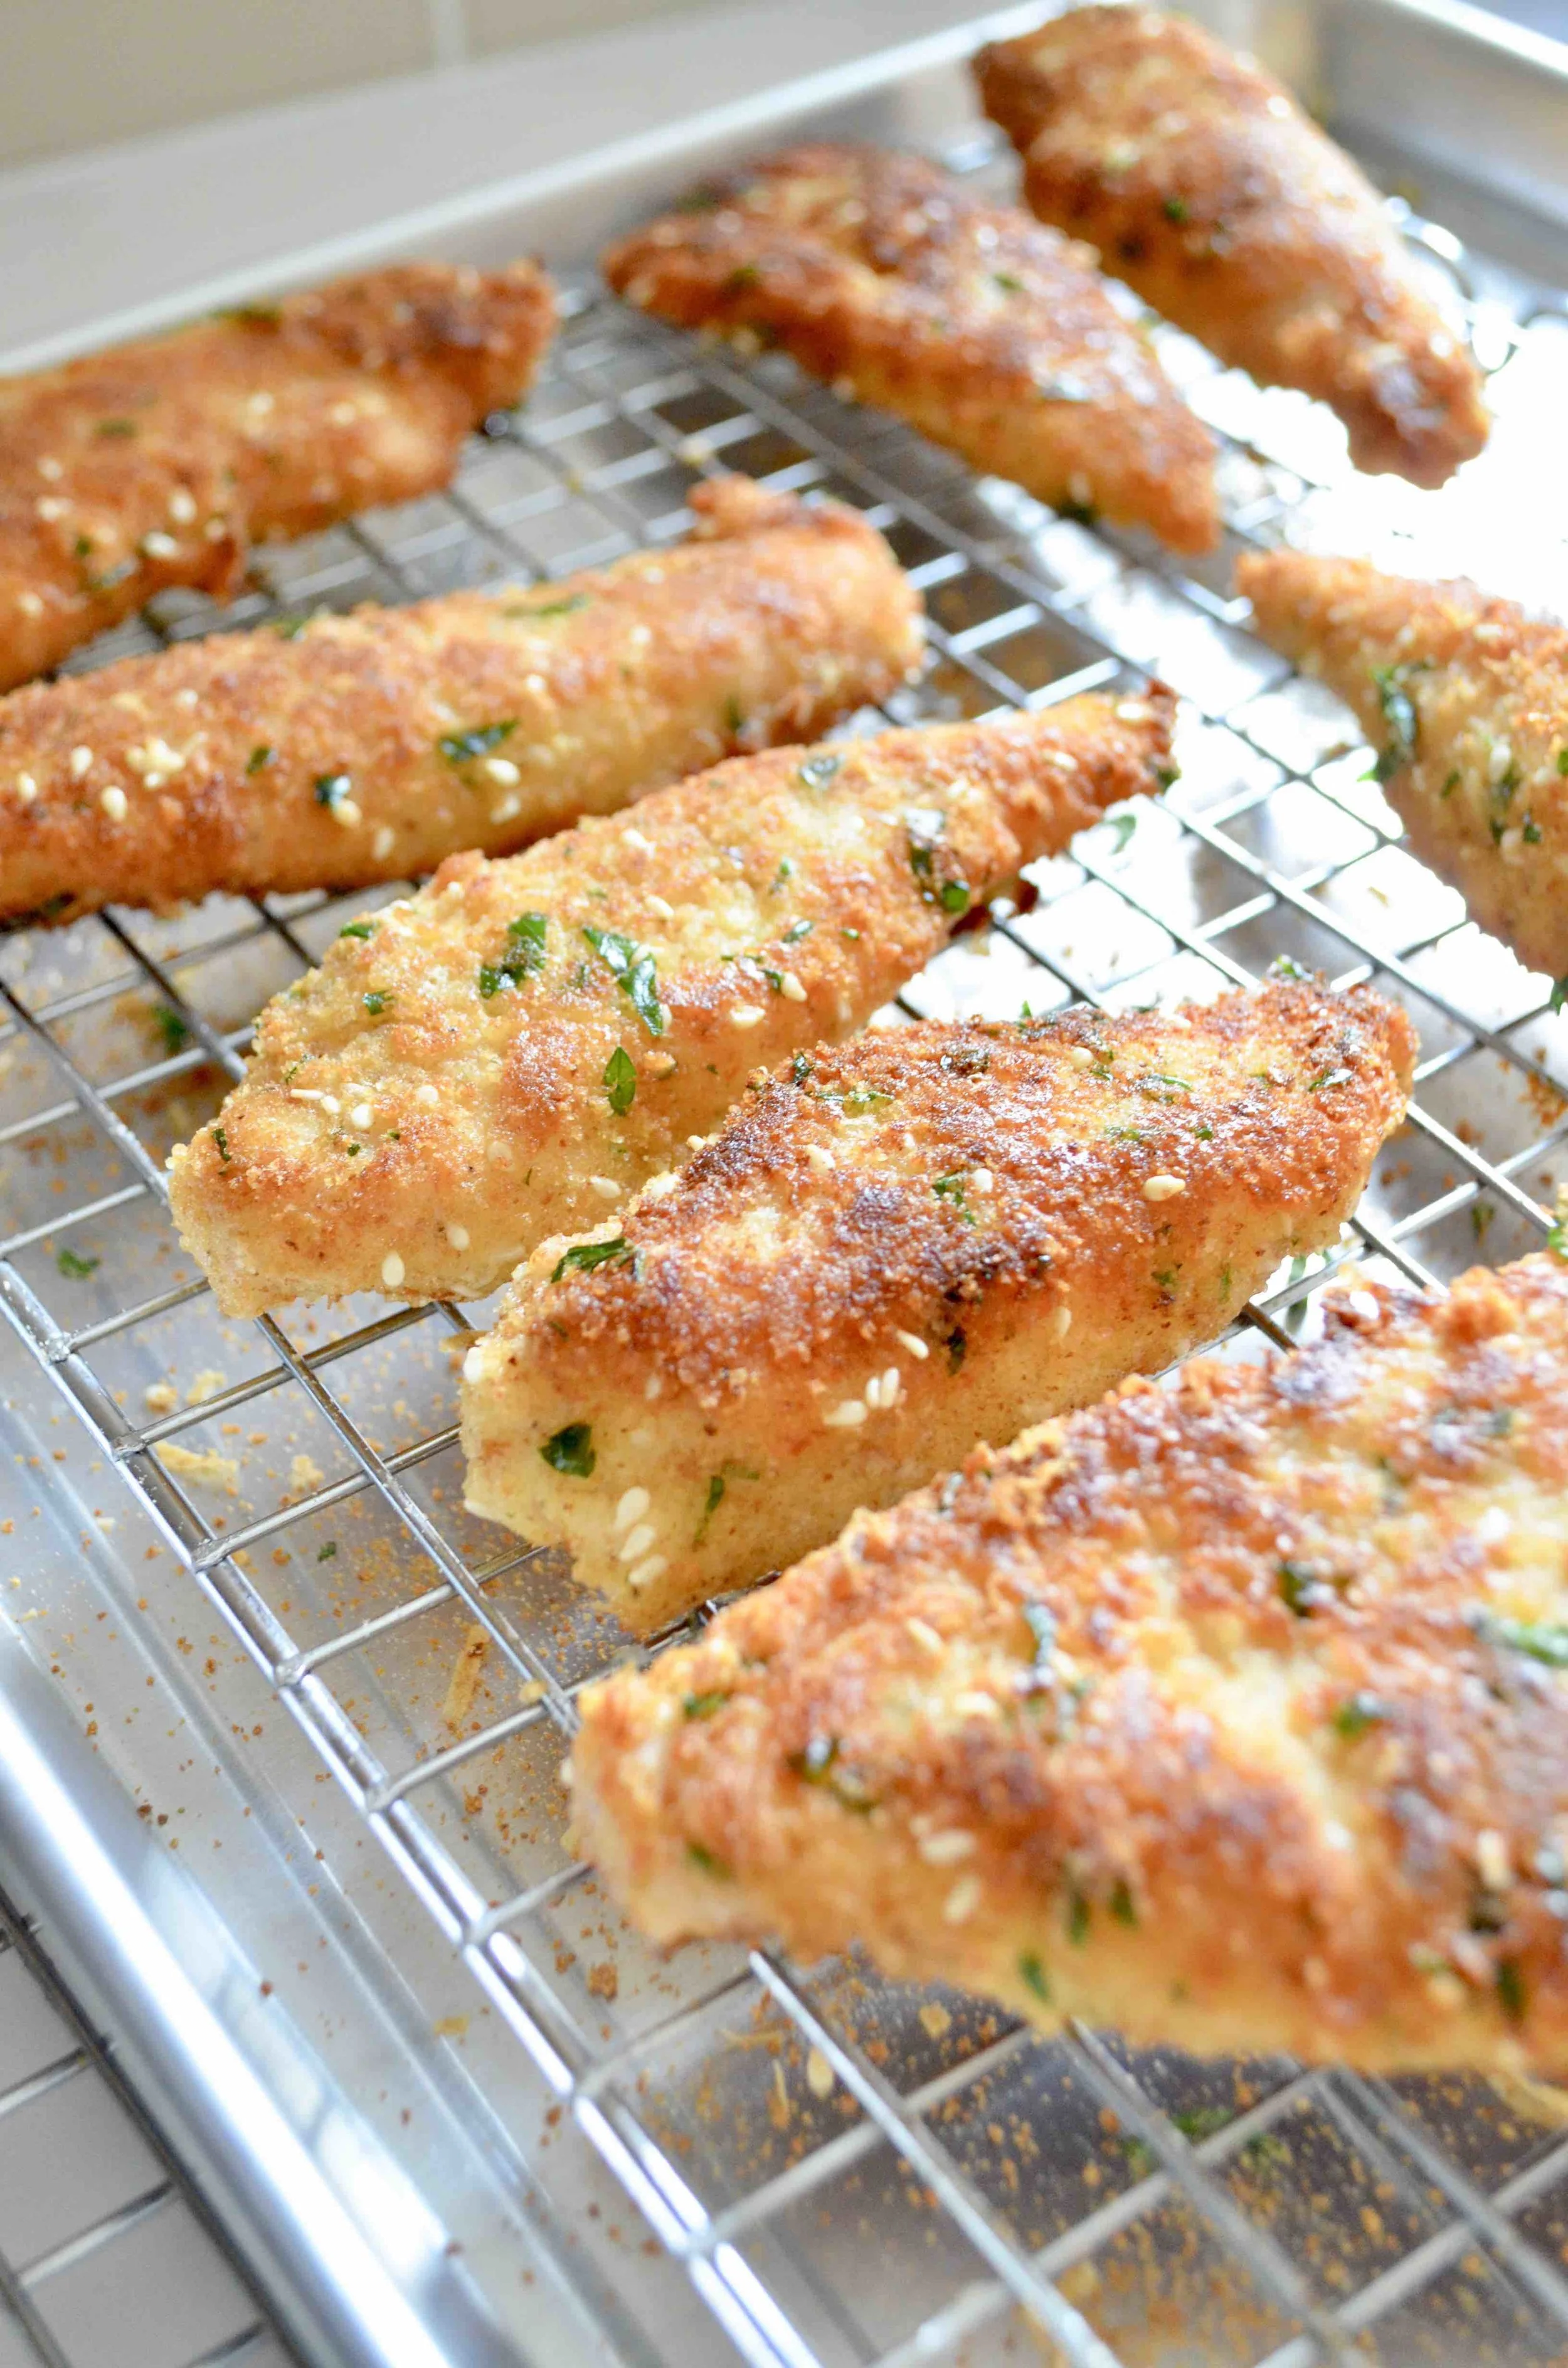
Place the chicken on a cooling rack that fits into a baking sheet
Repeat with the rest of the chicken pieces
With all the pieces on the cooling rack placed into or over a baking sheet, place the entire sheet into the oven and let the chicken cook at 350 degrees for about 10 minutes (if you are cooking larger pieces of chicken, then they will take longer, maybe 20 minutes) This finishes the cooking and allows the juices to settle which makes the outside crunchy and prevents the inside from getting dry.
Remove the baking sheet from the oven and allow the chicken to sit for at least 5-10 minutes
Serve hot, preferably with melted jelly (I know it’s weird but it’s good), honey, or ketchup