DIY Soap
We are ALL washing our hands a ton, sooooo why not make it fun? I think that is the best way to make sure kids are keeping their hands clean. Granted, my kids haven’t gone anywhere for about a month at this point besides walks around the neighborhood, but it’s a good habit to keep up!
DIY Soap is super easy because we aren’t actually making the soap itself. We are using a “melt and pour” soap as our base that is perfect for crafting. I have used this a few times on Home and Family if you want some more soapy ideas!
Tips for “Making Messes” with soap
*Depending on their ages, make sure the soap is cool enough to work with when it comes to the dying, mixing and melting.
*Don’t overheat the soap. I, personally, don’t know the exact science behind this, but I DO know (based on experience) that if you overheat it, it doesn’t work as well and it can become gummy, cloudy, and get little beads on the outside of it. So, work slowly and take your time when melting everything.
*If you have a thermometer around that you use for meat or for candy making, you can use that to check that the temperature doesn’t exceed 160 degrees for best results! (make sure to clean it well afterward)
*Make sure to allow the soap to set up completely before taking it out of the molds. If you want to expedite the process then you can put it in the fridge for a bit.
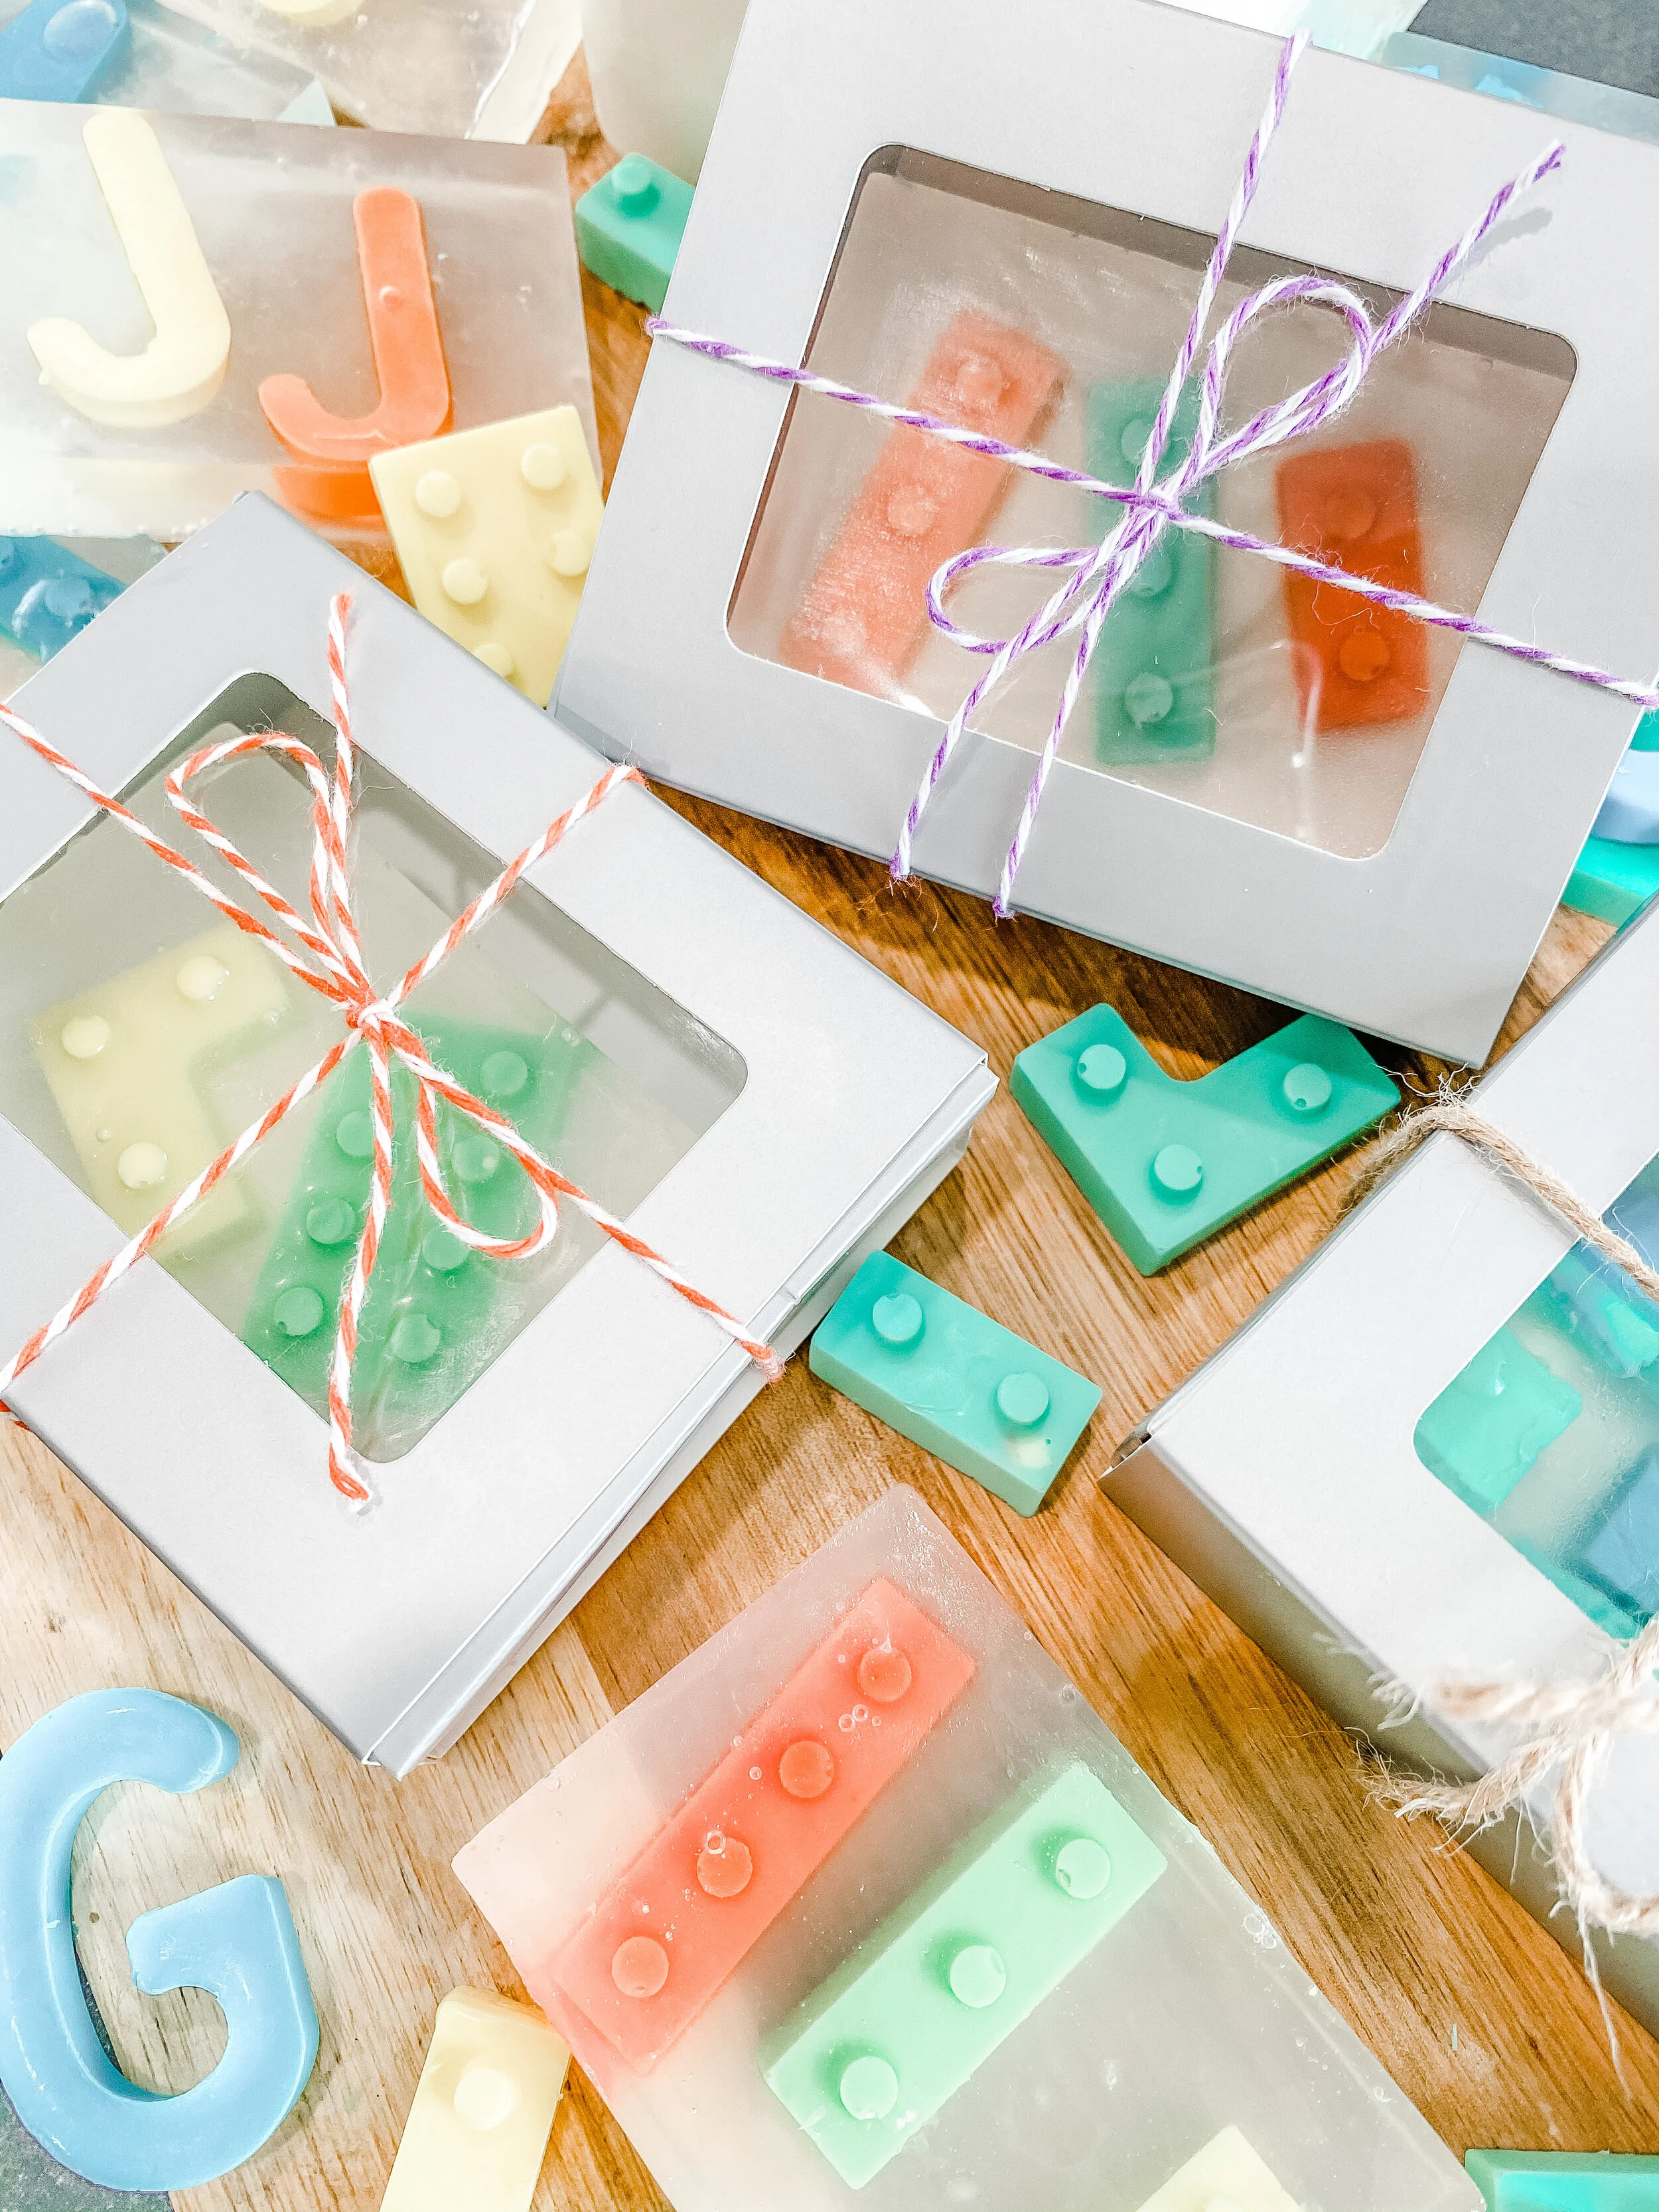
*If you want to create the soap where the legos are inside the clear soap, then be sure to let the glycerin soap cool enough before pouring, otherwise it will melt the shapes that you have in the molds (it helps to refer to the video for this part). This can also be done by pouring the glycerin into the rectangle-shaped molds and once it’s cooled a bit, then add drop the lego-shaped soaps into the molds until they are submerged.
Supplies
Goats milk soap or any other type of white-based soap
Spatula or popsicle sticks for stirring
Silicone molds (lego molds, rectangle molds, letter molds)
Cutting board
Knife
Paper Mart Soap Boxes With Window
Directions
Note: Keep the temperature of the soap below 160 degrees for the best results.
Cut the white soap with a knife into small cubes and place in a microwave-safe bowl.
Melt in a microwave-safe bowl according to directions; I recommend about 15 seconds then mix and repeat.
*You can add essential oils to this as well. We decided against it since my son has eczema and we try not to used anything with scents on his skin.*
Add the soap colorant to the melted soap and pour it into silicone molds as desired.
Allow the soap to completely harden up and remove it from the molds.
If you want to create a bar of soap with the designs in the inside then place the soap shapes into the rectangle molds while you melt the clear soap.
Cut the glycerin soap into small cubes and repeat the same melting process.
Once it’s melted, allow it to cool to almost room temperature (be sure to stir it so the top doesn’t create a film).
You can do this two ways:
One way you can do this is to let the glycerin soap cool enough so that it won’t melt the other soap when you pour it and then simply pour it over the lego soap. When doing this, you only want to pour enough so that it’s JUST above the lego shape. If you pour too much then you won’t see the shapes. (refer to the video for this)
Another way is to pour the glycerin soap into the rectangle molds first, let it cool, and then place the lego soap shaped (or whatever shape you are using) into the already poured, melted, and cooled glycerin soap. Just be sure to watch out for the top of the soap because it can harden as you wait.
Either way works as long as your timing is on point.
Once everything is set up you can package them in a really pretty way.
I’m obsessed with these boxes from Paper Mart because they are specific for soap!! They have a little window on the top so you can see what’s inside! I just tied it with a cute piece of twine and they were ready to go.


