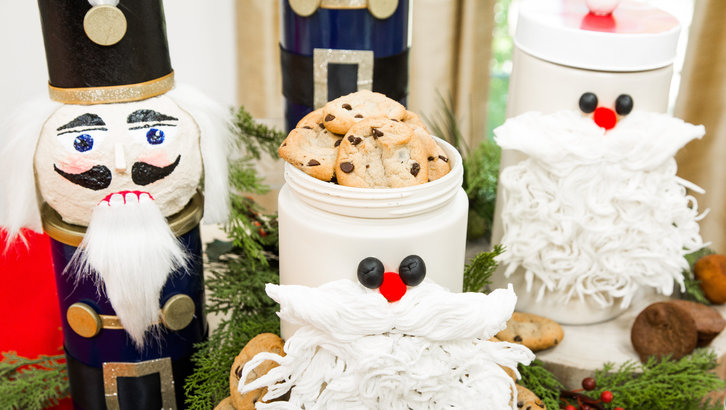
DIY Christmas Cookie Jars for Christmas in July on Hallmark's Home and Family Show
DIY Christmas Cookie Jars for Christmas in July on Hallmark's Home and Family Show
Happy Christmas in July!! What is Christmas without cookies? So, I had to make some really fun ways to give and store your Christmas cookies.
Video coming soon!
DIY Christmas Cookie Jars for Christmas in July on Hallmark's Home and Family Show
DIY Christmas Cookie Jars for Christmas in July on Hallmark's Home and Family Show
Materials for Santa Canister
Fabric stiffener
White yarn
Rubber bands
Scissors
Wax paper
Glass canister with removable lid
Peach spray paint
Red spray paint
White paint
Black clay
Plastic gloves
Materials for Nutcracker Canister
Oatmeal canister
Foam ball (size will depend on the canister size)
navy spray paint
gold spray paint
peach colored spray paint
white oven back clay
celluclay (instant paper mache)
paint pens
gold ribbon
small wood rounds for the buttons
faux fur fabric
2 toilet paper holders
glue gun
Directions for the Santa Canister
1. Spray the canister Peach colored.
2. Spray the lid red.
3. Once the lid is dry paint the outside rim of the lid white.
4. Meanwhile, make the beard by deciding how long you want it to be and then cut a
large amount of white yarn that length, you don't want it to be too thin and sparse
but not too thick where it would be too heavy to be glued on; tie the top with a
rubber band.
5. Cut some yarn for the mustache by deciding the length and then tying the center
with a rubber band.
6. Wearing the plastic gloves, pour some of the fabric stiffener into a bowl and dip the
entire beard in until it is completely saturated, using your hands to make sure all of
the yarn is covered.
7. Squeeze out the excess fabric stiffener.
8. Place the "beard" onto a sheet of wax paper and use your hands to make the shape
of the beard as desired.
9. Repeat the process with the mustache.
10. Allow to dry, this can take up to 24 hours.
11. Once dry, use a glue gun to place it onto the canister.
12. Then add the red pom pom on for the nose.
13. Form two small balls with the black clay and bake them in the oven according the
package instructions; once cool glue them onto the canister for the eyes.
14. Place the lid on to finish; if desired, you can paint a small dowel white and place it in
the center of the lid to look like the top of the hat.
Directions for the Nutcracker Canister
1. Cut the bottom of the foam ball so that it can sit flat.
2. Mix up the celluclay according to package instructions and cover the foam ball; allow to dry completely.
3. Spray paint the canister navy.
4. Spray paint the lid gold, along with the small wood rounds for the buttons.
5. Once the foam ball is dry, spray it with the peach spray paint.
6. Shape the clay into the desired shape of the nose; bake according to package instructions; spray paint the same color as the face and allow to dry.
7. Attach "buttons" and ribbon to the front as desired.
8. Draw the face with paint pens.
9. Attach the foam ball to the canister lid with a glue gun.
10. Make the hat by cutting two toilet paper holders together to create the correct size hat to fit the foam ball head.
11. Paint black and add any desired details.
12. Cut the fur fabric to make a beard and hair; attach with a glue gun.
13. Attach the hat over the hair with a glue gun.
14. Add any extra details that you like


