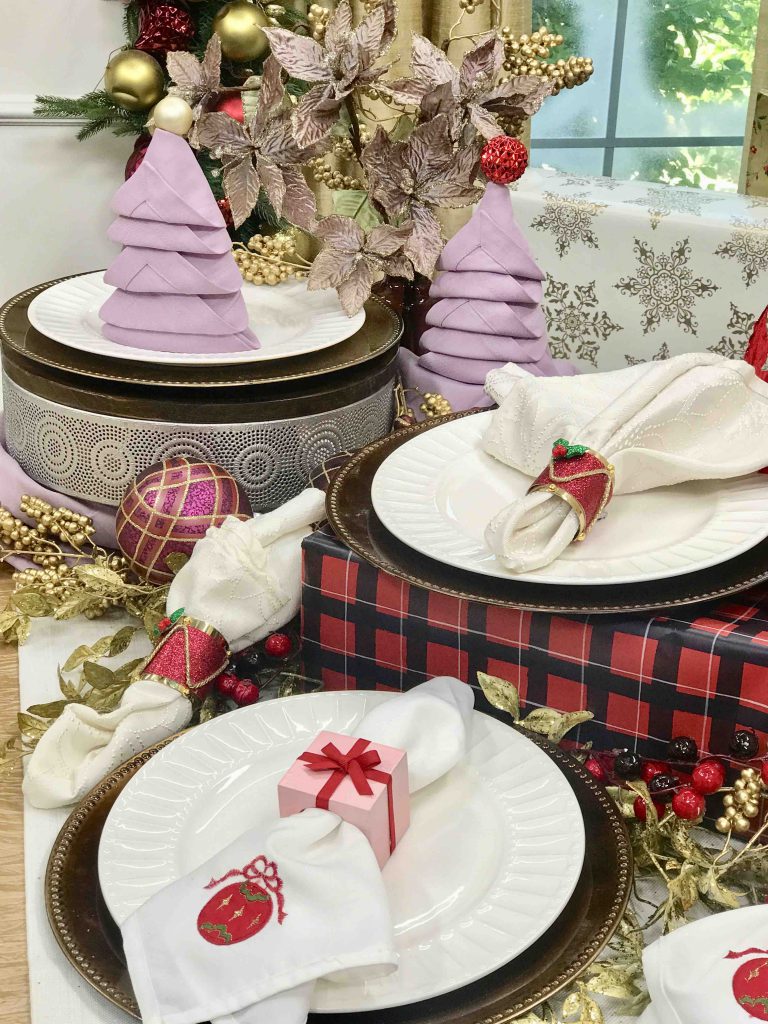
DIY Christmas Napkin Rings
DIY napkin rings
It's that time of year again, time to entertain! The holiday season can be extremely overwhelming because there is so much pressure for everything to be perfect and festive. Well, I am here to help, my friends. In order to make your table setting really fun, you don't need to buy an insane amount of stuff, you honestly, just need a simple touch to make it a conversation piece. Napkins can be an afterthought, so I am making them a focal point for your place setting. When your guests see that you put extra detail in the napkins, it makes you look like one of those people who go all out...little do they know that this actually makes your life easier because these crafts are easy to make!
Start your Christmas DIYing/crafting now and you will instantly remove the stress from your planning AND look like you are such an impressive planner.
Materials for Drum Napkin Rings
Round gold napkin rings
Glitter scrapbook paper
Hot glue
Chord
Materials for Present Napkin Rings
Square Napkin rings
Spray paint
Thin ribbonDirections For the Drum Napkin Rings 1. Take your 2 gold round napkins rings & hot glue them together 2. Once dry, Take your glitter scrapbook paper & wrap it around the napkin ring & glue to secure 3. Take your thin cord & cut it into little pieces of the height of your napkin ring . 4. Glue down cord pieces on angles throughout the outside of the drum & other embellishmentsDirections For the Present Napkin Rings 1. Hot glue your 2 square napkin rings together 2. Spray paint with your choice of color 3. Once dry take your thin ribbon & thread it over the top & bottom of your ring. Then, for the horizontal part of the ribbon, just covered it over the crack where you originally glued the 2 napkin rings together & secure on with glue.Directions For Christmas Tree Napkin Fold 1. Start with your napkin completely open 2. Fold in half & fold in half again 3. Place it in a diamond shape 4. Take just the top layer corner & fold up to the top corner but not completely touching it yet (almost to the point where you just have a border) 5. Do the same for the second layer & repeat for all other layers 6. Once that’s done, flip the napkin over & take bottom left corner & swing it over to where the fold at the top is in a straight line. Do the same for the bottom right corner 7. Flip over & fold up the little corners so they are facing up. After the top one is folded tuck the corners below in 8. Paperclip the back corner to give it a nice hold 9. Glue an ornament to a popsicle stick & once dry stick it in the top!
Napkin rings
Napkin rings
Napkin rings
Napkin rings
Napkin rings


